The Kommandant's New Driver
A couple of people have expressed an interest in how the groundwork was done for my diorama The Kommandant's New Driver, so I thought I'd take a few minutes out and tell how it was done. Nothing really groundbreaking here, but some of the techniques are pretty useful.
We'll take vehicle assembly as a given :)
Once the vehicles were completed, I began the basic layout. The tank was elevated to the approximate height I thought I would want, and the tow cable (made from the excellent technique shared with us by crockett in this thread (thanks crockett!) was stretched out to ensure that the length would work with the slope of the ground and the altitudes of the vehicles.
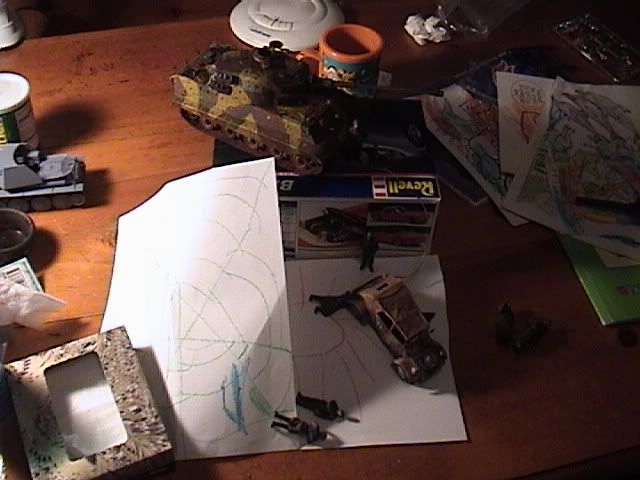
I then cut a piece of particle board to the size of the layout here. I sealed the particle board well, knowing that there would be some moisture in later steps and particle board + water = disaster.
Basic shapes were cut from floral foam (messy stuff!) and glued into place. I used white glue, but I'll never do that again--I don't know for certain to this day whether it's dry. A good five-minute epoxy should do the trick for next time.
Down in the valley, foam-core board was cut to form the river banks, and the slope (made of green floral foam) was placed. The whole shebang was then covered with Celluclay. This was my first time ever to use Celluclay, and I absolutely love the stuff. In the past, I used plaster because it was cheap, but never again.
Once the Celluclay had begun to dry (not yet stiff but not sticky-tacky anymore) I painted the entire thing with craft paint (little old lady paint) in a dark brown color that I thought looked sort of earthy-muddy. After that dried, the whole thing was dry-brushed (well, not completely dry…let's call it "moist-brushed") with a lighter, slightly redder brown. Once this was dry, the third color, a light, nearly tan brown, was dry-brushed over the entire surface. I can get the info on the color names/brands if anyone needs them.
Special attention was paid to the streambed. The middle got a heavy dose of the darkest brown, graduating into the lighter color toward the outside, to help promote the illusion of depth.
The next step was to go to my rock collection. I have a Ziploc bag filled with the very tiny pebbles I've collected from parking lots, the end of my driveway, etc. There's a gold mine of natural-looking scale stones to be found on concrete structure. Look in the places where traffic is minimal-near the edges, in the gutters, etc. Don't go looking for tiny rocks out by the center stripe of a two-lane road, because (A) fast-moving vehicles tend to hurtle the tiny pebbles away from the traffic area, keeping the road mostly clean and sending useful materials to the gutter, and (B) fast-moving vehicles tend to smack model builders who are gathering pebbles in the middle of the road.
Pebbles were chosen selectively and placed at random, rather than dump-toss-scatter. I wanted rocks in the earth, not rocky terrain, so I tried not to go overboard. I made it a point to place several small stones in the stream, as I knew they would come in handy later on. The pebbles were pressed into the ground cover while the Celluclay was still relatively soft. I also pressed the fence and the trees--three evergreens and a scattering of roots from the garden--into the ground cover, too. Once the Celluclay was a bit nearer to drying, the trees and fence were removed, leaving nice locator holes. Taking away the extras makes the application of snow much easier later on.
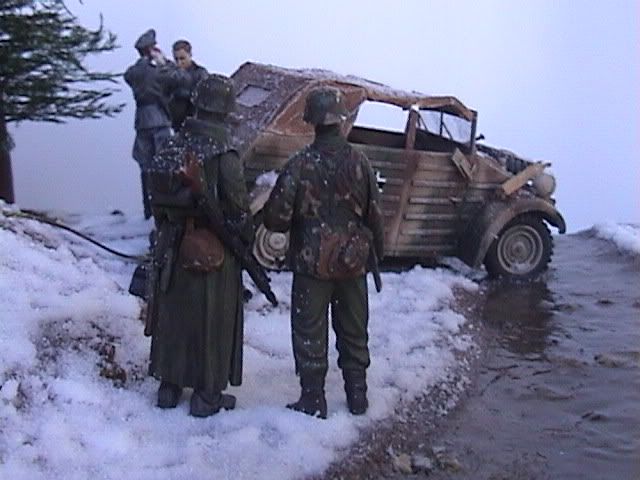
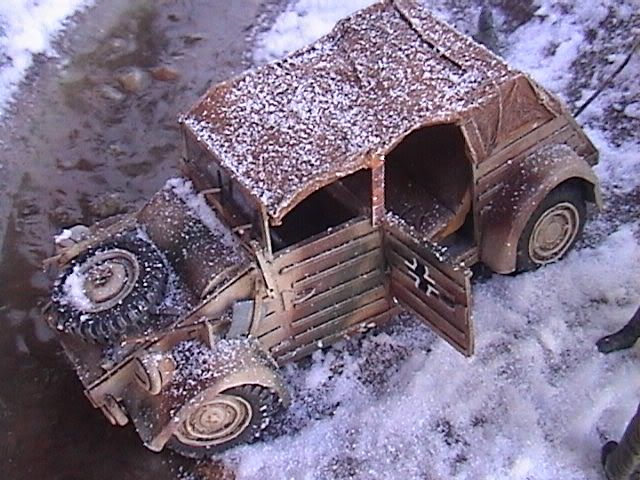
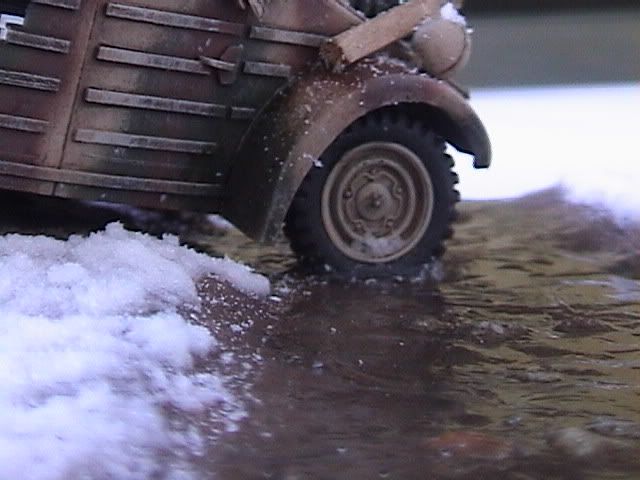
The stream is made of gloss varnish, poured on in a thin layer. I poured it because I was dumb enough to think I could keep it off some of the rocks, and I was in too big a hurry to even think about brushing it on a layer at a time. The disadvantage was that it took a long time to cure and become clear, and for a nervous twenty-four hours I thought my stream would be forever fogged with uncured varnish. Advice: if you pour your varnish, pour it thin. VERY thin. And be prepared to wait. Once the varnish dried, I added ripples with a Woodland Scenics product called Water Effects (I strongly suspect that the Allene's Tacky Glue would have done the same job. The body of Allene's is strikingly similar to the Water Effects). Careful attention was paid to the rocks protruding from the surface of the water, so that there were ripples trailing away to show motion in the water.
A few shots showing the effect of the varnish streambed
At some point it hit me: a scene in the Ardennes would have to include evergreens. No choice. Pine. Spruce. Fir. That sort of thing.
So I consulted Shep Paine and I read on the internet and I collected ideas and materials until I came up with a method of creating evergreen trees that I think is pretty cool, but be forewarned that it's also tedious. Don't expect a good tree in a half-hour.
I went to Hobby Lobby (check out Michaels, MJDesigns, your basic craft store type place) and browsed the floral department until I found a dried natural…something. I dunno what it's called, because if there was a label on it, it was printed in Invisible Ink. Suffice it to say that it looked like little tiny pine branches, and that was all I needed to know. [Update: Turns out it wasn't invisible ink after all. The stuff is called Plumosus, and I used Light Green.] It ran me 3-4 bucks for enough stuff to make several trees, so I was happy.
Now, I've heard of making evergreen trunks by sharpening dowels to a point, but I'm no whittler. I tried to whittle a dowel and found that I was mostly just making a mess, so I rolled out Sculpey in little sausage shapes, then slowly rolled one end down to a relative point. I made three--I decided that an entire evergreen forest would be (A)overkill and (B) a huge pain in the butt, so I decided on three trees plus some dead deciduous growth would suffice.
After rolling out and baking the three Sculpey trunks, it was time to give them a little texture. I coated them with Bondo Glazing and Spot Putty (the stuff in the orange tube that's much cheaper than the specialty items at your LHS), smearing it on with my finger. I waited until it had begun to crust slightly, then wrapped it in gauze. The texture was far too uniform, so I then attacked it with a toothpick, drawing long, quick lines down the length of the trunk, breaking up the nice neat squares left by the gauze. I then stood the trunk in a ball of clay while the putty hardened.
Once the putty was cured, I set out with my pin vise and a couple different sizes of tiny drill bits, drilling holes in the trunk. If you don't have a pin vise, get one…I've only had mine a couple of weeks and I already can't remember how I managed to get by without it. I've drilled out machine gun barrels and all sorts of stuff with it…best investment I've made in this hobby in quite a while.
Anyhow, you want your holes to be anything but uniform. I'll say that again: make the holes as random as possible. Be aware of "dead" areas as they will leave big bald spots (which are okay, and look natural if there aren't too many of them).
With the holes drilled, it was time to cut off some foliage. The dried stuff I bought is in huge branches which need to be trimmed to size. Look at the tree and decide how wide it should be at its widest point, then cut branches accordingly. Start at the bottom and work your way up, cutting successively smaller branches as you near the top. This will take practice, but while you're learning, it's a good idea to err on the side of caution, i.e. cut too big and trim to size later.
Gluing is pretty straightforward: place a dollop of slow-set superglue or high-tack white glue (Woodland Scenics Hobby-Tac or, if you're cheap like me, Allene's Tacky Glue) on a piece of card or the Dirty Corner of your work area (don't you have a Dirty Corner? That place where you wipe brushes when you misplace your paint rag? Oh well…I digress). Just dip the appropriate end of the branch in the glue, then stuff it in one of the holes. Repeat for hours, working from the bottom up. Once all the holes are filled, set it back in the clay ball to dry (now is not a good time to lay your tree on its side).
After drying, check it over for any really odd-looking dead spot, drill and add branches as necessary, and trim any branches that came out too lengthy.
Once this is done, your tree is all set!
Fine pine needles are made from dried naturals in the floral section.
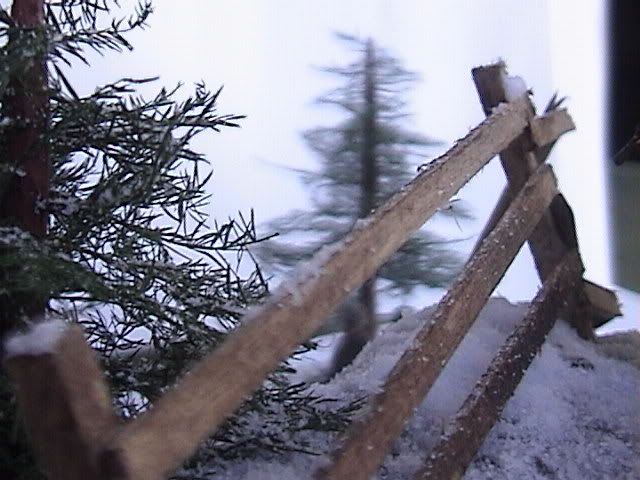
All through the project, I predicted a blizzard. I wanted snow, snow, snow, huge drifts, deep tracks…
But then I said, nah.
I decided, about midway through building my trees, that I wanted the earth to show through. I wanted the vertical faces exposed, of course, but I knew that open areas would add more interest, and a sort of muddy-slushy appearance on the road would be preferable to a big, white blur.
I used Woodland Scenics snow for this. I had read lots of good things about baking soda, and had intended all along to use nothing else because I'm a cheapskate. However, in the eleventh hour, I stumbled onto a post here on the forums saying that baking soda tends to yellow and can sometimes ooze an icky-sticky fluid after a while. Ick. So I broke down and spent the 8 bucks (or was it 9? Whatever) and bought the Woodland Scenics stuff, and it was worth every penny.
I started my snow storm with "yesterday's snow"--the stuff that appears to be accumulated from a previous snowfall, the kind of snow that has a little "nearly-melted" look around the edges. This is done by mixing the snow with thinned white glue to a thick consistency (it made me think of a vanilla shake from McDonalds!) and brushing it all over the place--everywhere I wanted a real accumulation of snow. It was brushed at random on the road, in clumps and strips as if it had been well-traveled. This mixture was also added to the upper surfaces of the vehicles.
The next bit was fresh snow, sprinkled on from altitude and then carefully brushed off the river, then set with a spray of Scenic Cement from Woodland Scenics (thinned white glue or aerosol hairspray have a similar effect, if you're really budget-conscious).
Despite my efforts to keep the stream clean, I learned a hard lesson here: Scenic Cement, a white-glue type of product, has a very negative effect on gloss varnish, namely that it makes it not-so-glossy. Dull as a sermon on Super Bowl Sunday, to be precise. I decided to push on anyway, hoping that I'd be able to take care of the dull stream later.
The whole dio was dulled with Model Master Lusterless laquer, then sprinkled VERY lightly with a tiny spattering of fresh snow while the laquer was still slightly tacky. At this point, I wasn't worried about the dull laquer, since my stream was already messed up…
Then, when the laquer cured, I went back with the gloss varnish and a brush and laid down two extremely thin coats of varnish which, I am happy to report, brought my stream back to life.
I suppose that just about covers everything…if I've left anything out, or if there are any other questions, let me know and I'll be glad to share whatever I know or suspect.

Thanks for showing an interest, and happy building!


