Articles
Scratchbuilding a Kubelwagen
A few people have expressed an interest in seeing exactly how I went about scratchbuilding my (almost)1/35 Kubelwagen, so I've put together a step-by-step guide to how it was done.
At times during the construction of my Kubel, I took shortcuts that I would not recommend to anyone interested in doing things the right way. For that reason, I've added extra instructions or suggestions in blue.
Planning:
The first step in the process was gathering research materials. I downloaded a dozen or so images from the 'web for reference, and in addition, I broke out my 1/18 Ultimate Soldier XD Kubelwagen and propped it up in front of my work area. I would also recommend locating the specifications for the 1:1 Kubel--length, width, height etc. I didn't--I built this one with strictly visual references--and as a result the finished model is out of scale by a few millimeters.
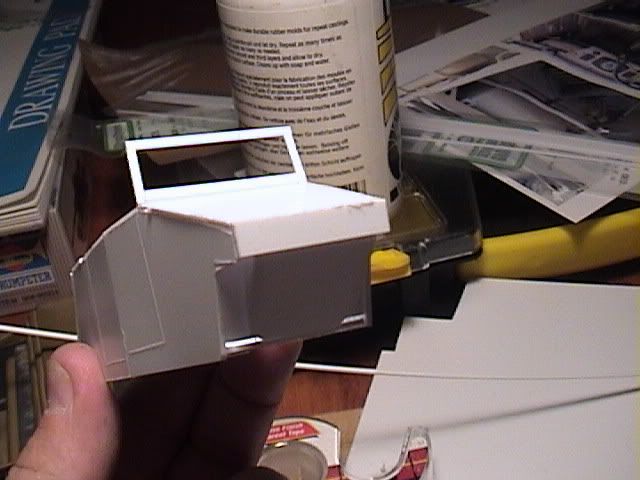
I had two kit wheels from a long-ago kit, and I began my drawings by tracing a circle around one of these wheels. From there, using the 1/18th replica and the images from the web, I began to draw rough sketches of the vehicle. It is important at this stage to pay close attention to where each panel lies in relation to the others, and begin mentally "blocking in" groups of parts for sub-assemblies and subsections. I also recommend using using Frank Crenshaw's excellent Scale Calculator to compute the exact dimensions in scale (I didn't--that's why my Kubel is not exactly to scale). These drawings would later be cut off the paper and used for patterns.
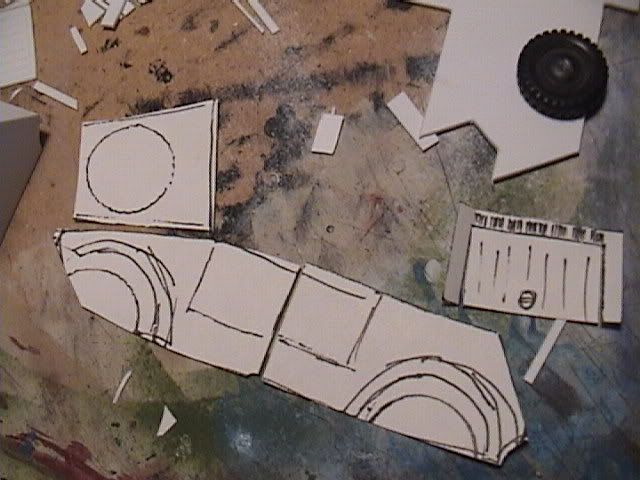 The patterns. Note that the body side patterns are cut into two pieces, since the body lines of the vehicle change abruptly between the doors.
Construction
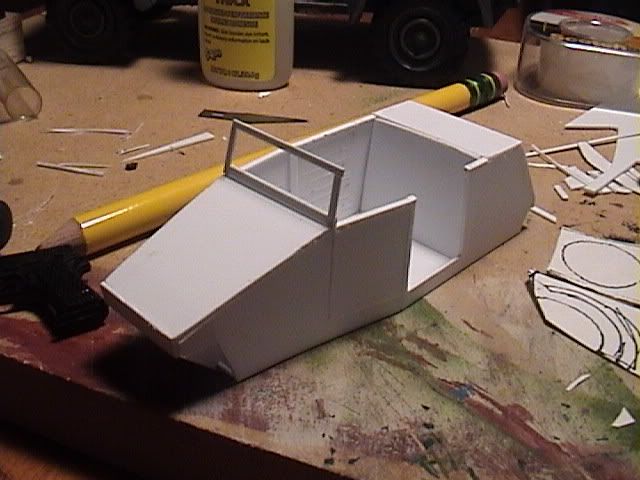
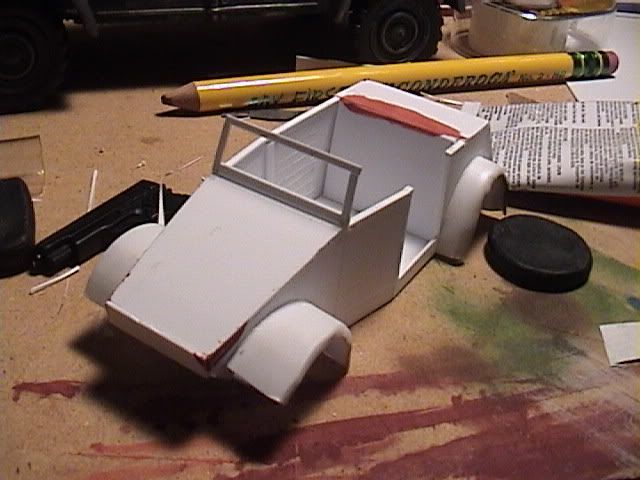
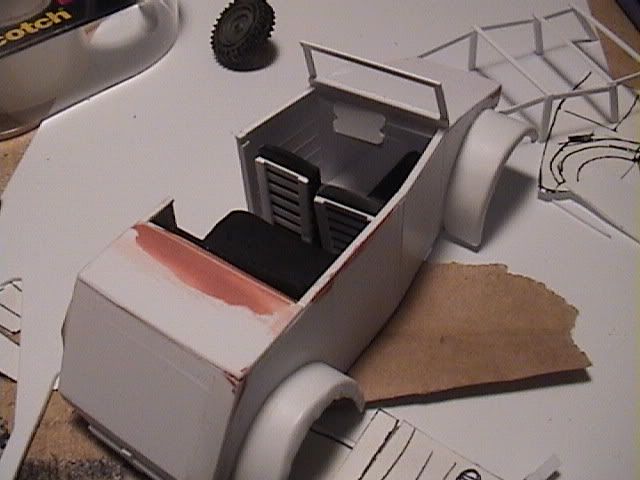
Now the fun starts. Here I began cutting the front, side, and rear panels from Evergreen .030" sheet styrene. The panels were scribed with interior detail prior to assembly, relying heavily on visual references for placement. One of the doors was cut out to be displayed open, but this is a matter of personal preference. The bottom panel was to be cut later, using the assembled main body as a guide. The windshield frame was cut from .020 X .060" styrene strip.
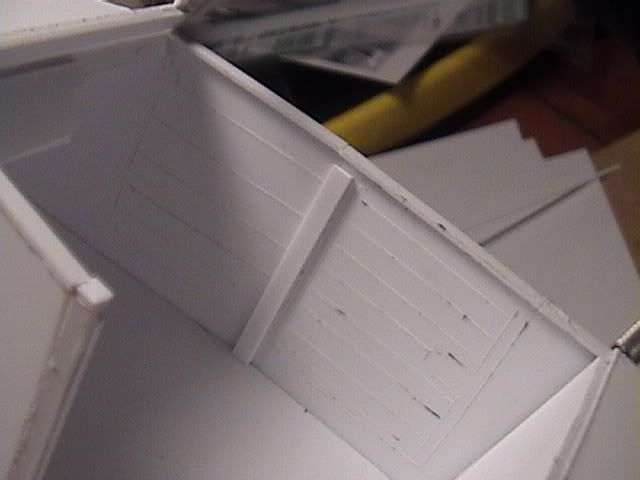
Initial assembly. Note the scribed door panel details and the strips added for interior door posts.

Driver's side rear door. Note the rather rough interior detail--careful finishing and painting can make this look quite serviceable.
Inside door handles were cut from .020" X .040" styrene strip, thusly:
Front view of initial assembly. Note that the front section, with its sharp undercut, is composed of four pieces.
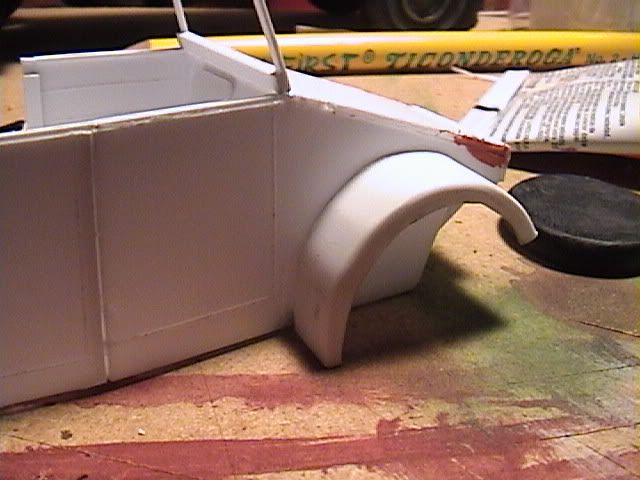
Next, fenders were cut from .020" sheet styrene. The rear fenders are pretty straightforward, but the front fenders are flared, which makes them a bit trickier to cut properly. Both sets of fenders were intentionally cut too long, so they could be trimmed to size after being formed into a semicircle. The front fenders were cut in a rectangle, to be flared later.
A circular form, about 1/4" thick, was made from Sculpey, using the tire and wheel as a guide. The diameter of the form should be made to the size and shape of the fender wells. Bake according to the package directions.

Basic shapes of fenders and fender form.
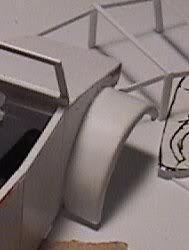
The fenders were then bent around the shape of the form and the ends were secured in place with lumps of clay. The form was positioned 1/8" or so below the top edge of the styrene fender shapes. The top edge was then heated and pressed against the form to create the fender edge. This also helped to solidify the curvature of the fender itself.
The fenders, after heat-shaping to the hardened Sculpey form. Note the form beside the rear fender.
Another view of the fender showing a little more clearly how the fender was shaped.
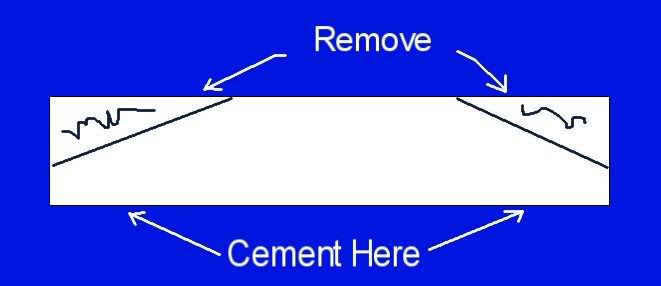
The front fenders were a little more tricky. They were bent and formed in the same way, then the excess width was cut away at an angle to match the sweep of the forward section of the vehicle.
Now that all the panels and exterior parts were in place, I puttied the seams (I don't know what sort of specialty putties are out there for modelers--I know there are plenty--but I use Glazing and Spot Putty from Bondo). I then set this assembly aside to dry while I went to work sculpting the remaining parts.
The seats, headlights, and various attachments poking up from the front of the vehicle were all made from Sculpey. A toothpick was dragged across the seats to simulate wrinkles in the fabric, but for the most part the detail applied was minimal. After baking, seats received frames made of styrene strip (.030 X .080" for the uprights and .020 X .060 for the crossmembers). A crude dashboard and instrument panel were cut from .030" sheet and a shifter was made from stretched sprue which was then heated and balled on one end.
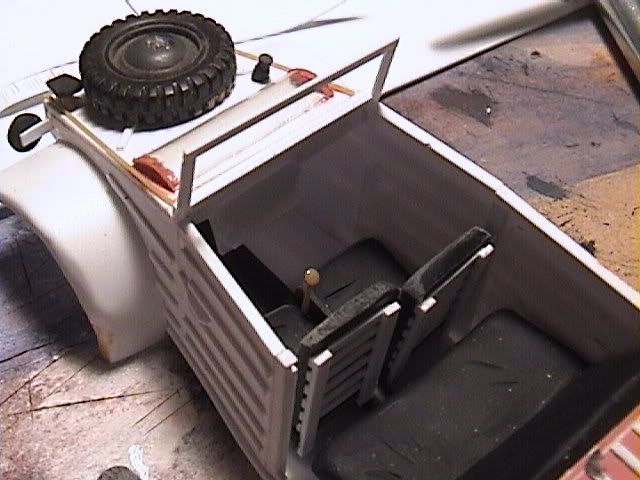
Two images of interior details.
Next came the corrugated sides. This was the most time-consuming and tedious part of the project, but also the stage that began to really bring things together and make the model begin to look like what it was supposed to be. The corrugation lines were cut to fit from .020 X .040" styrene strips, with each piece custom-fitted to its location. In several places, it was feasible to measure and cut one, then use it as a pattern for nearby strips, but in other places the cutting and fitting had to be done on a case-by-case basis--very tedious! The latch for the engine compartment was constructed of a thin slice of sprue with .020" strip attached, then placed on the rear deck.
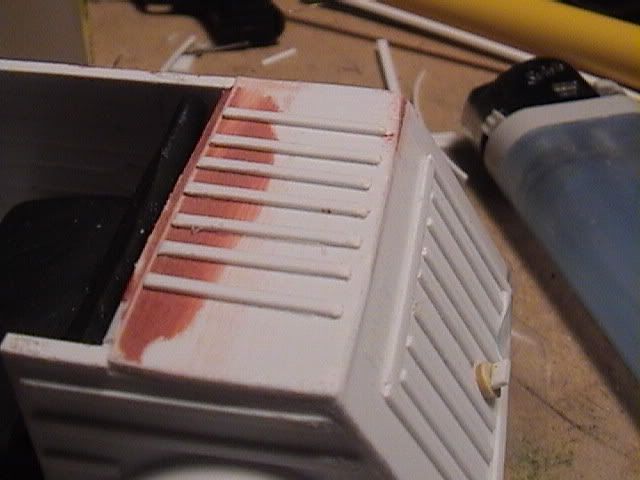
Next stage, with the corrugation strips and other minor details in place.
Moving 'round to the front of the Thing, I attached the various gizmos (could someone please tell me what these things are called?) that stick up from the front compartment. Two strips of .020 X .040" styrene were crossed on this panel and a spacer was added to give the spare wheel just a hint of elevation rather than having it lay directly on the vehicle body. The blister on the panel was made by cutting approx. 1/3 down the lenght of a plastic container which once held X-acto blades--any cylindrical plastic will do here, I'm sure--and the ends were filled with putty. The shovelhead was cut from .020" styrene and attached to a stretched-sprue handle, then secured with a strap made of .020" X .080" strip.
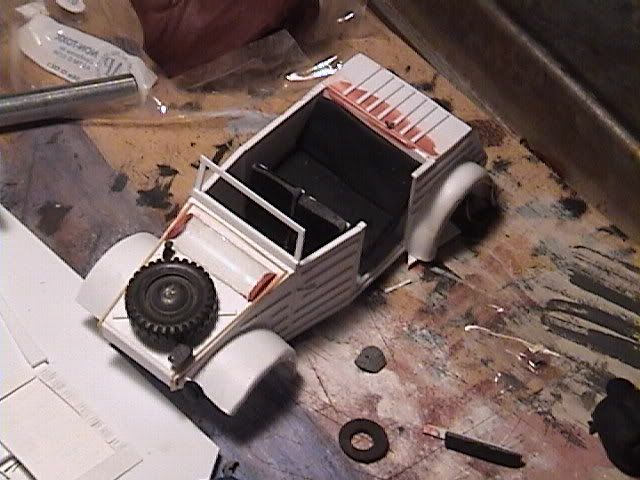
Side mirrors were cut from .020" sheet, with frames made of .020" strip, then cemented in place just ahead of the front doors. Windshield wipers were made of very small strips of .020" X .040" cut in half lenghtwise and cemented to bits of stretched sprue.
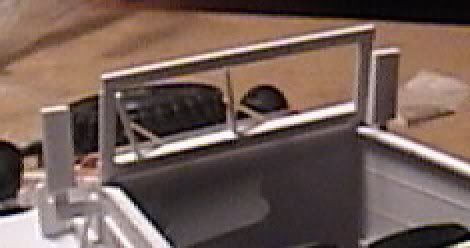
Detail of wipers and mirrors.
Outside door handles were cut from .020" X.040" strip, with the corners cut away:
Painting and Weathering
Volumes have been written on painting and weathering techniques, and I don't claim to be a master, so this section will involve "how I did it"...but I urge you to read the countless articles on painting and weathering written by those more skilled than myself.
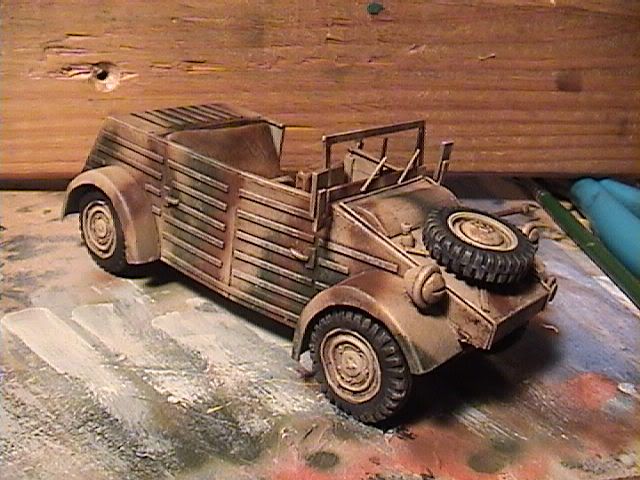
The body was airbrushed using Model Master basic colors (they don't have the Panzer colors in my area...grrrrrr) The body was sprayed overall with Sand, followed by a camo pattern using Leather and Dark Green. Seats were painted with "little old lady paints" (craft paint by Apple Barrel, Americana, FolkArt, etc.) as were the tires. The color I used for the seats was called "Honey", I think. Tires were plain ol' flat black.
I weathered the model using burnt umber artist's oil thinned to the point where it's really more dirty thinner than thinned paint. I love the way oils find the panel lines and recesses and really dig in for the long haul...I spent years ignoring all of the folks who said "weather with oil washes", but I've finally seen the value. Once the oil wash was dry (overnight) I got out my "Granny paint" again, this time using a color called Raw Linen, and dry-brushed the entire surface of the model, paying close attention to the rib lines on the panels. This brought the highlights right to the top, in sharp contrast to the sunken, oil-washed recesses. This technique will make any armor model spring to life--and, in truth, carried my li'l Kubel from Good to Mucho Good in a few simple strokes.

Hope you've found something useful in this how-to. If you have comments or questions, feel free to e-mail me!
Good luck and happy modeling!